
I absolutely adore having aam papad with a cup of warm chai or as a sweet treat after a spicy meal. The sweet, tangy flavor of the mango pairs so wonderfully with the heat of Indian dishes.
It’s the little moments, like sharing these dried mango treats with family, that truly enhance each dining experience. Aam papad is perfect for summer picnics or even just to enjoy at home.

Aam papad is more than just a snack – it’s a vibrant piece of Indian tradition. This chewy mango candy delivers joy in every bite and is a fantastic way to enjoy mangoes long after the season has ended.
Making aam papad is surprisingly easy, and with this simple recipe, you’ll be delighting in its heavenly flavor in no time.
You Might Like These Recipes!
A Fresh Take on Green Juice Recipe
Chocolate Pots de Crème Recipe
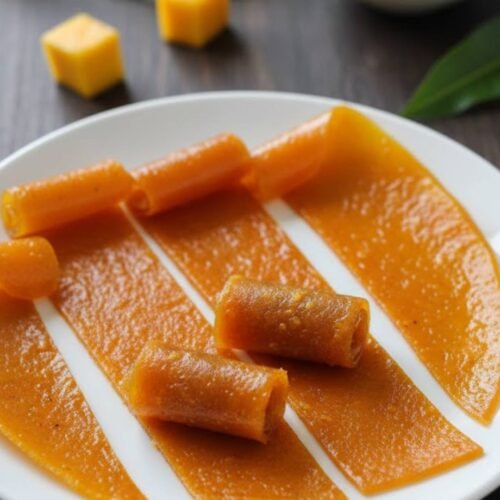
What is aam papad?
Aam papad is a dried mango flatbread typically enjoyed as a sweet treat in Indian households. It’s made by pureeing ripe mangoes, sweetening them, and then drying the mixture until it forms a translucent, chewy candy. This delightful dessert has an irresistible sweetness and a hint of warmth from spices that make it a beloved favorite across generations.
Why This Recipe Works?
This aam papad recipe is straightforward, allowing you to harness the natural sweetness of mangoes while adding just a touch of sugar and fragrant spices. The method of cooking the mango puree until it thickens ensures a beautiful texture. Plus, I’ll share some essential tips for perfecting this treat in your home kitchen.
Ingredients You’ll Need To Make This aam papad recipe

– 2 cups of ripe mango, chopped
– 1½ tablespoons of sugar (increase sugar a bit for extra sweetness)
– ¼ teaspoon of cardamom powder
– ½ teaspoon of ghee (clarified butter)
– 1 teaspoon of lemon juice (to enhance flavor)
– Optional: A few saffron strands (for added flavor and color)
Ingredients From : hebbarskitchen.com
How to make aam papad recipe?
Let’s dive into the step-by-step process to make your homemade aam papad! This recipe brings together simple ingredients and straightforward steps that will have you enjoying delicious papad in no time.
Step-by-step directions
Step 1: Prepare the Mangoes

Start by taking 2 cups of ripe mango, preferably sweet and juicy ones. Chop them into small pieces. The quality of the mango is key; the riper they are, the sweeter your aam papad will be!
Step 2: Blend the Mango

Next, toss the chopped mango into your blender. Add 1½ tablespoons of sugar. Blend the mixture into a smooth paste, ensuring you do not add any water. You want to keep the mango’s purity, and this concentrated flavor will shine through in your final product.
Step 3: Cook the Puree

Transfer the mango puree into a kadai (a type of Indian cooking pot) and place it on medium heat. Keep stirring continuously. This part is important – you want the mixture to cook evenly and thicken. Watch as it reduces, maintaining the heat to avoid burning. Cook for about 15-20 minutes, or until the puree thickens properly.
Step 4: Add the Spices

When you notice the thickness has reached your desired consistency (think spreadable but not too runny), it’s time to add the flavor. Sprinkle in ¼ teaspoon of cardamom powder, and if you’re feeling fancy, a few saffron strands. Mix them in well to distribute the flavors evenly throughout the mango mixture.
Step 5: Prepare the Plate

Take a steel plate (or any flat surface that can go in the sun) and brush it with ½ teaspoon of ghee. This prevents the aam papad from sticking later.
Step 6: Spread the Mixture

Transfer the mango mixture onto the ghee-brushed plate. Spread it out evenly to your preferred thickness; about ¼ inch is typically good. You can use a spatula or the back of a spoon to achieve a uniform texture.
Step 7: Sun Dry the Puree
Place the plate in direct sunlight for 2 days to a week, depending on the climate. The sunlight will help to dry the aam papad until it becomes translucent and firm. Don’t forget to cover it with a thin cheesecloth to keep dust and pests away!
Step 8: Scrape the Sides
After your aam papad has dried, use a knife to gently scrape along the sides, loosening it from the plate. This step is delicate; you want to keep the aam papad intact without tearing it.
Step 9: Cut and Store
Finally, peel the aam papad gently from the plate. Cut it into your desired shapes – squares, rectangles, or even fun shapes if you’re feeling extra creative. Store the aam papad in an airtight container for later enjoyment.
Tips
– Choose Ripe Mangoes: Select sweet, overripe mangoes for the best flavor.
– Sunlight Matters: Sun-drying is essential. If the weather is not cooperating, consider using an oven on low heat instead, but avoid direct high heat.
– Ghee for Coating: Always use ghee for brushing the plate; it adds a lovely flavor and prevents sticking.
– Flavor Adjustments: Feel free to adjust the sugar based on the sweetness of the mangoes you use.
– Check Consistency: Proper cooking of the puree is crucial—don’t rush through this step!
How to Store The Leftovers?
Store your aam papad in an airtight container in a cool, dry place. If you’ve made a large batch, consider using parchment paper to separate layers of aam papad to avoid sticking. It can typically last for several weeks, although it’s hard to resist finishing them sooner!
What are some recommended side dishes for aam papad recipe?
– Masala Chai: The sweet and spicy notes of the chai keep the flavors balanced.
– Curd (Yogurt): A refreshing tanginess from yogurt complements the sweet mango perfectly.
– Fruit Salad: Pair with a mix of fruits to enhance the tropical theme.
– Puffed Rice: The crunch of puffed rice adds a delightful texture contrast to the chewy aam papad.
– Indian Sweets: Serving with other Indian desserts like gulab jamun can create a festive spread.
If the items are not available in your pantry, what are some substitute options for the ingredients?
– Mango: Use other fruits like ripe papaya or apples for a twist, but note that the flavor will change.
– Sugar: Substitute with honey or jaggery, but reduce the quantity slightly since they are sweeter.
– Cardamom Powder: Ground cinnamon or nutmeg can be interesting alternatives if you’re short on cardamom.
– Ghee: Use any other cooking oil or butter for brushing the plate if you lack ghee.
– Lemon Juice: Vinegar can work in a pinch for a tangy kick, but use sparingly.
Aam Papad Recipe
Equipment
- Blender
- Kadai
- Steel plate
- Knife
- Sun-drying area
Ingredients
- – 2 cups of ripe mango chopped
- – 1½ tablespoons of sugar increase sugar a bit for extra sweetness
- – ¼ teaspoon of cardamom powder
- – ½ teaspoon of ghee clarified butter
- – 1 teaspoon of lemon juice to enhance flavor
- – Optional: A few saffron strands for added flavor and color
Instructions
Step 1: Prepare the Mangoes
- Start by taking 2 cups of ripe mango, preferably sweet and juicy ones. Chop them into small pieces. The quality of the mango is key; the riper they are, the sweeter your aam papad will be!
Step 2: Blend the Mango
- Next, toss the chopped mango into your blender. Add 1½ tablespoons of sugar. Blend the mixture into a smooth paste, ensuring you do not add any water. You want to keep the mango’s purity, and this concentrated flavor will shine through in your final product.
Step 3: Cook the Puree
- Transfer the mango puree into a kadai (a type of Indian cooking pot) and place it on medium heat. Keep stirring continuously. This part is important – you want the mixture to cook evenly and thicken. Watch as it reduces, maintaining the heat to avoid burning. Cook for about 15-20 minutes, or until the puree thickens properly.
Step 4: Add the Spices
- When you notice the thickness has reached your desired consistency (think spreadable but not too runny), it’s time to add the flavor. Sprinkle in ¼ teaspoon of cardamom powder, and if you’re feeling fancy, a few saffron strands. Mix them in well to distribute the flavors evenly throughout the mango mixture.
Step 5: Prepare the Plate
- Take a steel plate (or any flat surface that can go in the sun) and brush it with ½ teaspoon of ghee. This prevents the aam papad from sticking later.
Step 6: Spread the Mixture
- Transfer the mango mixture onto the ghee-brushed plate. Spread it out evenly to your preferred thickness; about ¼ inch is typically good. You can use a spatula or the back of a spoon to achieve a uniform texture.
Step 7: Sun Dry the Puree
- Place the plate in direct sunlight for 2 days to a week, depending on the climate. The sunlight will help to dry the aam papad until it becomes translucent and firm. Don’t forget to cover it with a thin cheesecloth to keep dust and pests away!
Step 8: Scrape the Sides
- After your aam papad has dried, use a knife to gently scrape along the sides, loosening it from the plate. This step is delicate; you want to keep the aam papad intact without tearing it.
Step 9: Cut and Store
- Finally, peel the aam papad gently from the plate. Cut it into your desired shapes – squares, rectangles, or even fun shapes if you’re feeling extra creative. Store the aam papad in an airtight container for later enjoyment.
Notes
Nutrition
FAQs
1. Can I use frozen mangoes for aam papad?
– Yes, but ensure they are thawed and have the excess moisture drained out before blending.
2. Is aam papad gluten-free?
– Absolutely! Aam papad is naturally gluten-free, making it a great option for gluten-intolerant individuals.
3. How do I know when the aam papad is properly dried?
– It should feel firm to the touch, have a translucent appearance, and be pliable but not sticky.
4. Can I add other flavors to aam papad?
– Yes! Vanilla extract or even a hint of chili powder can add a fun twist.
5. How can I incorporate aam papad into recipes?
– You can chop aam papad and mix it into smoothies, sprinkle it on salads, or even use it in desserts for added sweetness and texture.
Conclusion
Making aam papad is a wonderful way to celebrate the flavors of mangoes and create a unique treat that brings joy to any occasion. The process may take a bit of patience with the sun-drying aspect, but the reward is certainly worth it.
Share it with your family and friends, or enjoy it as a little sweet indulgence for yourself – it’s a win-win! Happy cooking!