
Have you ever noticed how some dishes transport you back to the warmth of your childhood? Amla murabba is one such treat for me! Growing up, I remember my grandmother preparing this preserve, filling the kitchen with an inviting aroma that had us all gathering around the table.
The tartness of amla paired with the sweetness of sugar creates a unique balance, making it an ideal companion for morning toast, yogurt, or even enjoyed by the spoonful straight from the jar. It’s a staple that feels like a hug in a jar.

Today, I want to share with you a beloved recipe that combines health benefits with a burst of sweet flavor: amla murabba. Amla, otherwise known as Indian gooseberry, is packed with Vitamin C and antioxidants.
What makes this dish special is that it transforms the raw fruit into a luscious sweet preserve that not only tastes delightful but also offers numerous health benefits.
You Might Like These Recipes!
Chocolate Pots de Crème Recipe
What is Amla Murabba?
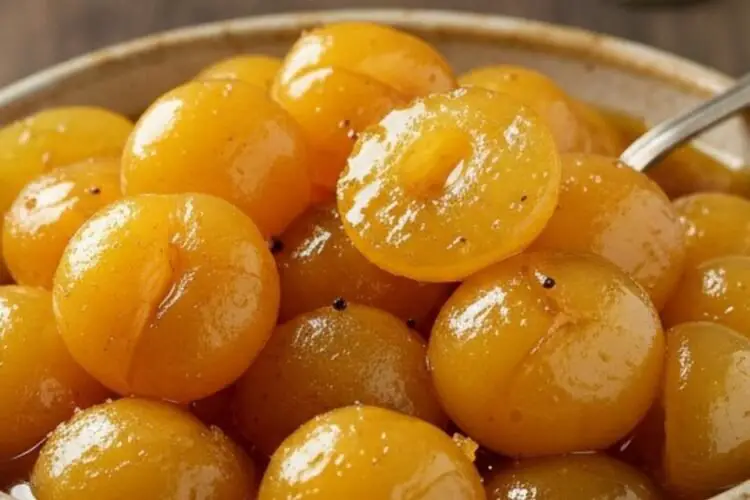
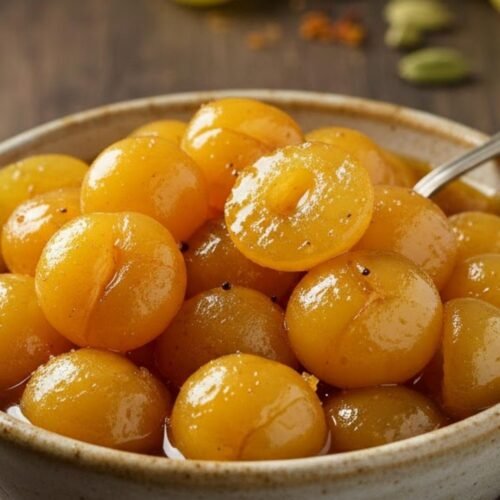
Amla murabba is a traditional Indian sweet made by simmering amla in sugar syrup until tender. This method preserves the fruit, while also making it easier to enjoy its naturally tart flavor. The result is a glossy, sweet treat that can last for months when stored properly. Whether you want to eat it for breakfast, have it as a snack, or serve it as a condiment, amla murabba is incredibly versatile.
What is the Flavor Profile of This Dish?
This dish offers a delightful contrast between sweet and tart. Amla has a distinct sourness that brightens up the sugary syrup in which it’s cooked. When you take a bite, you’ll be greeted with a juicy burst of flavor, making it a refreshing addition to your pantry. There’s a hint of depth and warmth from any added spices that can elevate your experience even further.
Why You’ll Love This Dish
You’re going to love this recipe for so many reasons! First, it’s a fantastic way to incorporate amla into your diet. With its renowned health benefits—ranging from strengthening the immune system to supporting digestion—this is a treat you can feel good about indulging in. Second, the sweetness of the murabba is an excellent balance for snacks or meals that need a little zing. Lastly, making it at home means you can control the ingredients and avoid preservatives that often accompany store-bought versions.
The Ingredients

1. 1 Kg fresh amla
2. 1 1/2 kg sugar
3. 6 cups of water
4. 1 tbsp fresh lemon juice
5. 2 tsp food-grade lime (slaked lime)
6. 1-2 tsp green cardamom powder (optional, for added flavor)
7. Optional: A pinch of saffron for a hint of elegant flavor and color.
Ingredients From : food.ndtv.com
How to Make Amla Murabba
Let’s dive into the cooking process! Follow me step by step as we turn these tart gems into a fabulous murabba.
Step 1: Prepare the Amla

Start by giving each amla a gentle poke with a fork. This will allow the syrup to absorb into the fruit better. Think of it as creating little channels for the sweetness to pour in. Next, dissolve 2 tsp of the food-grade lime in a bowl of water and soak the amla overnight. This helps in tenderizing the fruit while also balancing its tartness.
Step 2: Rinse and Drain

Once your amla has soaked overnight, remove them from the lime solution and give them a good wash under running water. You might want to repeat this soaking and rinsing process once more to ensure any residual lime is completely gone.
Step 3: Pre-Cook the Amla

After your amla is washed, place them in a pot with enough water to cover. Bring the water to a gentle boil, cooking the amla until they turn tender and slightly translucent. This may take about 15-20 minutes. Keep an eye on them; you don’t want them to turn mushy.
Step 4: Prepare the Syrup

While your amla cooks, it’s time to make the syrup. In a separate pot, combine the sugar, lemon juice, and 6 cups of water. Heat over medium flame until the sugar dissolves completely. Bring this mixture to a boil, then lower the heat slightly to maintain a one-thread consistency.
Skim off any scum that forms as it boils. You want a clear, thick syrup that can coat the back of a spoon.
Step 5: Combine Amla with Syrup

Once your amla is tender, drain them and set them aside. Add the cooked amla gently into the syrup, and allow everything to come back to a gentle boil. Simmer for about 4-5 minutes. At this point, you can stir in a pinch of green cardamom powder and saffron for extra depth and flavor if desired.
Step 6: Cool and Store

After simmering, turn off the heat and let everything cool to room temperature. Once cooled, transfer the murabba into clean, airtight jars. The coolness helps to preserve the flavors while keeping it fresh for longer.
Tips
– Choose the Right Amla: Look for firm, bright green amla that is free from blemishes.
– Soaking Time: Don’t rush the soaking process; this is crucial for balancing the flavors.
– Experiment with Spice: Feel free to add spices such as cloves or cinnamon for a unique twist.
– Storage: Make sure your jars are sterilized before filling them to prolong shelf life.
– Consistency: Always check the syrup’s consistency before combining it with the amla. It should be thick enough to cling to the fruit.
How Can You Store This Amla Murabba?
To store your amla murabba, ensure that you have filled clean, sterilized jars with the preserve. Store them in a cool, dark place, such as a pantry or cupboard. Once opened, keep the jar in the refrigerator and enjoy it within a few weeks.
Alternative Choices for Ingredients
If some ingredients are hard to find, consider these alternatives:
– Amla Substitute:Gooseberry can be used in a pinch if amla is unavailable, though the flavor will vary slightly.
– Sugar Alternative:Honey or jaggery syrup can work, but note that they will alter the taste somewhat.
– Lime Substitute:Citric acid can be an alternative to lime for soaking, though use sparingly.
– Cardamom Alternative: If cardamom isn’t available, cinnamon can add a lovely warmth.
– Lemon Juice Substitute: For a different zing, use tamarind pulp.
Serving Suggestions
1. Breakfast Toast: Spread it over your morning toast for a healthy kick.
2. Yogurt Dish: Stir it into yogurt for a sweet and tangy parfait.
3. Cheese Plate Companion: Pair it with a cheese platter as a delightful contrast.
4. Porridge Addition: Add a spoonful to your oatmeal or porridge for an extra flavor boost.
5. Snack on Its Own: Grab a spoonful for a quick and healthy snack!
What Other Substitute Can I Use in Amla Murabba?
1. Sweetener:Coconut sugar can be used instead of regular sugar for a lower glycemic index.
2. Flavors: Add vanilla essence for a different flavor profile.
3. Tartness: Use pomegranate seeds for a bit of tart crunch.
4. Nut Gaps:Chopped nuts can be mixed in if you want a little texture.
5. Dried Fruits:Dried apricot bits can be added for extra sweetness.
Amla Murabba Recipe
Equipment
- Deep pot
- Fork
- measuring cups
- airtight jars
Ingredients
- 1 Kg fresh amla
- 1 1/2 kg sugar
- 6 cups of water
- 1 tbsp fresh lemon juice
- 2 tsp food-grade lime slaked lime
- 1-2 tsp green cardamom powder optional, for added flavor
Optional: A pinch of saffron for a hint of elegant flavor and color.
Instructions
Step 1: Prepare the Amla
- Start by giving each amla a gentle poke with a fork. This will allow the syrup to absorb into the fruit better. Think of it as creating little channels for the sweetness to pour in. Next, dissolve 2 tsp of the food-grade lime in a bowl of water and soak the amla overnight. This helps in tenderizing the fruit while also balancing its tartness.
Step 2: Rinse and Drain
- Once your amla has soaked overnight, remove them from the lime solution and give them a good wash under running water. You might want to repeat this soaking and rinsing process once more to ensure any residual lime is completely gone.
Step 3: Pre-Cook the Amla
- After your amla is washed, place them in a pot with enough water to cover. Bring the water to a gentle boil, cooking the amla until they turn tender and slightly translucent. This may take about 15-20 minutes. Keep an eye on them; you don’t want them to turn mushy.
Step 4: Prepare the Syrup
- While your amla cooks, it’s time to make the syrup. In a separate pot, combine the sugar, lemon juice, and 6 cups of water. Heat over medium flame until the sugar dissolves completely. Bring this mixture to a boil, then lower the heat slightly to maintain a one-thread consistency. Skim off any scum that forms as it boils. You want a clear, thick syrup that can coat the back of a spoon.
Step 5: Combine Amla with Syrup
- Once your amla is tender, drain them and set them aside. Add the cooked amla gently into the syrup, and allow everything to come back to a gentle boil. Simmer for about 4-5 minutes. At this point, you can stir in a pinch of green cardamom powder and saffron for extra depth and flavor if desired.
Step 6: Cool and Store
- After simmering, turn off the heat and let everything cool to room temperature. Once cooled, transfer the murabba into clean, airtight jars. The coolness helps to preserve the flavors while keeping it fresh for longer.
Notes
Nutrition
FAQs
Q: Can I make amla murabba without soaking?
A: Soaking helps in reducing the bitterness of amla and makes it tender. Skipping this step may not yield the same results.
Q: How long does homemade amla murabba last?
A: When stored properly in an airtight jar, you can enjoy it for up to six months to a year.
Q: Is it safe to eat amla murabba during pregnancy?
A: While amla is generally considered safe in moderate amounts, it’s best to consult with a healthcare professional when pregnant.
Q: What are the health benefits of amla?
A: Amla is rich in Vitamin C, and antioxidants, and can help in digestion, promote skin health, and improve immunity.
Q: Can I use frozen amla for this recipe?
A: Yes, frozen amla can work too, but ensure they are thawed and excess moisture is removed before preparation.
Conclusion
Making amla murabba is a delightful way to encapsulate the zesty goodness of amla in a sweet format. Not only is it a fabulous treat, but it’s also a nutritious choice that can benefit your health in several ways. So go ahead, embrace your inner chef, and whip up this delicious preserve!
Trust me; you’ll find yourself reaching for the jar time and again, making every bite a delicious memory. Happy cooking!