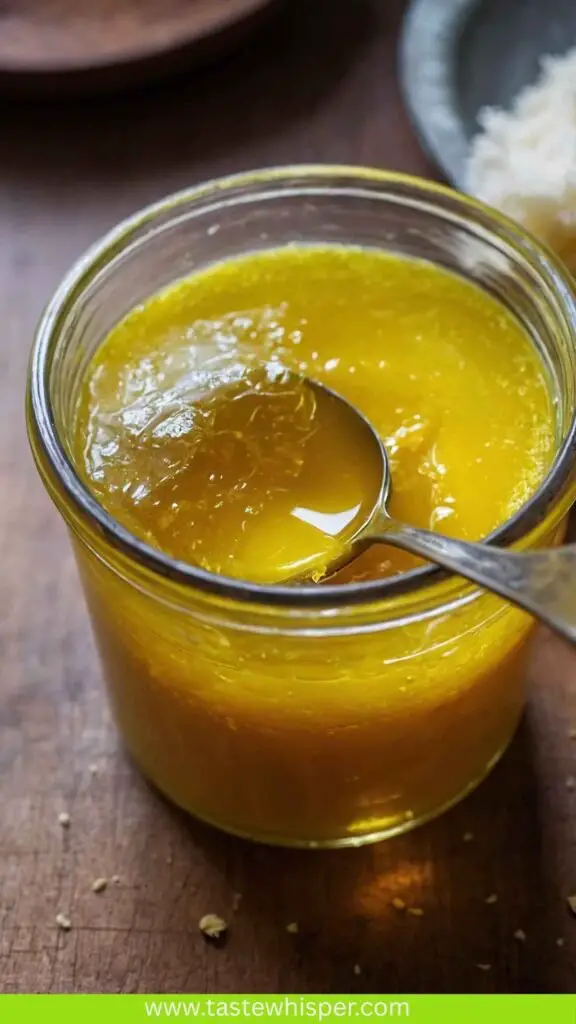
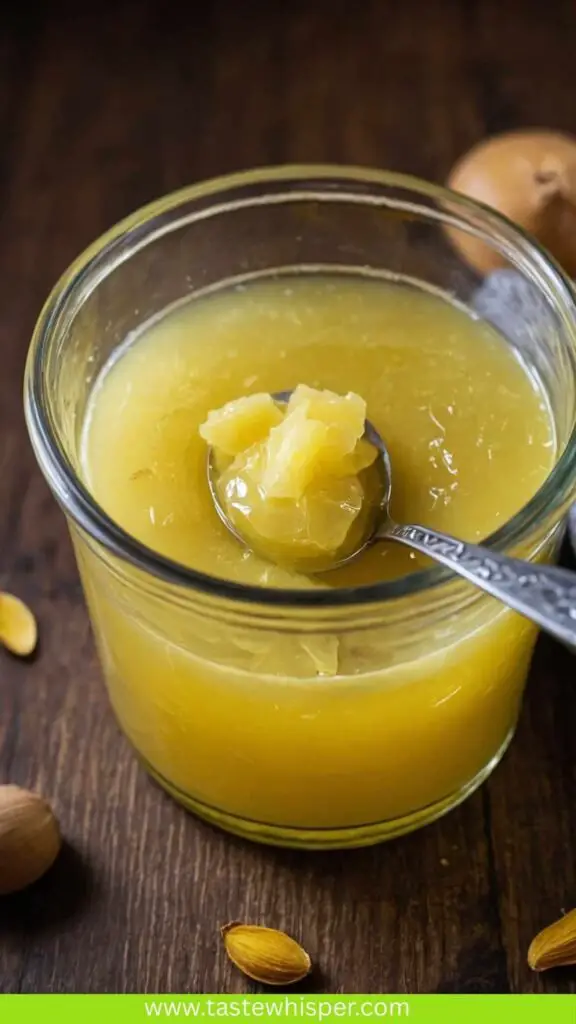
As a food enthusiast, I often find myself lost in the kitchen, exploring textures and tastes. One of my favorite revelations has been ghee, a type of clarified butter often used in Indian cuisine. One chilly evening, after a hearty meal of spicy lentil dal, I felt that something was missing. It hit me—what if I whipped up some homemade ghee to complement my dishes? The idea sounded fantastic. Ghee adds a rich flavor that elevates everything from simple roasted vegetables to fluffy rice. Let me take you through my journey of making ghee and why you’ll want to try it too.
What is Ghee?

You’ll Also Like These Recipes
So, what exactly is ghee? Simply put, ghee is clarified butter, but it’s a bit more magical than that. During the process of making ghee, milk solids and water are removed from butter, leaving behind pure butterfat. This process not only intensifies its flavor but also makes it stable at room temperature, meaning it has a longer shelf life than regular butter. Plus, ghee has a higher smoke point, making it perfect for frying and sautéing without burning.
The Ingredients
Making ghee is simple, requiring just a few ingredients. You’ll need:
- 1 pound unsalted European-style butter: I prefer European butter because it has a higher fat content, which means better flavor and a denser texture.
- ½ teaspoon fine sea salt: This enhances the flavor and can balance the richness of the ghee.
- 1 teaspoon vanilla bean paste (optional): While this isn’t traditional, a hint of vanilla can add a unique depth.

How to Make Ghee
In the following sections, I’ll guide you step by step through the process. It’s straightforward, but there are nuances that can make all the difference. Let’s dive in.
Step 1: Prep Your Materials
Start by assembling all your ingredients. You’ll need a heavy-bottomed saucepan, a heat-proof spatula, a fine-mesh strainer, and a jar for storing the ghee. I usually choose a glass jar because it’s easy to clean and shows off that beautiful golden color.
Step 2: Melt the Butter
Place your unsalted butter in the saucepan over medium-low heat. As the butter begins to melt, you’ll hear soft crackling sounds. This is where the magic starts! It’s like watching a performance unfold.
Step 3: Let It Simmer
Once the butter is fully melted, reduce the heat to low. Allow the butter to simmer gently. You’ll notice the milk solids start to separate and sink to the bottom. Keep stirring occasionally, gently scraping the bottom of the pan to ensure even cooking. This is where the aroma starts to fill the air. It’s captivating!
Step 4: Watch for Color Change
After about 10-15 minutes, the butter will begin to foam. This is normal; it’s just the water evaporating. As it continues to cook, the milk solids will turn golden brown. This phase is crucial— don’t walk away! Keep a close eye on it. You want to catch the moment right before the solids turn too dark, as that can introduce a bitter taste.
Step 5: Strain the Ghee
Once you see the milk solids at the bottom turning golden brown, remove the pan from the heat. Allow it to cool slightly for a minute, then carefully pour the melted ghee through the fine-mesh strainer into your jar. You can also use cheesecloth for an even finer filter if you prefer. Discard the solids. Congratulations, you’ve made ghee!
Step 6: Cool and Store
Let your ghee cool to room temperature before sealing the jar. It will solidify into a beautiful golden butterfats. When I first made ghee, I couldn’t believe I had created such a delightful ingredient.
Notes on Making Ghee
- Use good quality butter: The flavor of your ghee is only as good as the butter you use.
- Keep the heat low: This prevents burning and ensures that the milk solids cook evenly.
- Be patient: Ghee takes about 20-30 minutes to make; rushing it can lead to a burnt flavor.
- Store properly: Ghee can be stored at room temperature in a cool, dry place for up to three months.
- Experiment with flavors: Once you master basic ghee, feel free to try adding herbs or spices during the cooking process for a unique twist.
Storage Tips
After making ghee, you’ll want to store it properly to maintain its flavor and quality. Here are some quick pointers:
- Cool completely before sealing: This prevents condensation, which can lead to spoilage.
- Use airtight containers: Glass jars are ideal, but any airtight container will work.
- Keep away from heat and light: Store it in a dark cupboard or pantry to prolong shelf life.
- Refrigerate for extended freshness: If you want to make large batches, feel free to store in the fridge, although it will solidify.
Nutrition Information (per tablespoon)
Ghee is high in calories, but it’s packed with good fat. Here’s a brief overview of what one tablespoon provides:
As with any fat, moderation is key, but ghee can be a flavorful addition to your diet.
Serving Suggestions
Ghee’s versatility makes it easy to incorporate into your daily meals. Here are five ways to enjoy it:
- Cooking Grains: Use ghee to sauté rice or quinoa with herbs and spices before adding water. It adds a lovely richness and enhances flavor.
- Roasting Vegetables: Toss your favorite seasonal veggies in ghee before roasting. The caramelization adds depth that is simply irresistible.
- Baking: Substitute ghee for butter in baking recipes. It provides a unique flavor in cookies, muffins, and cakes. Just be cautious with the measurements as ghee is more concentrated.
- Spread on Bread: Use ghee as a spread on toast or bread instead of butter. It gives a delightful nutty taste.
- In Coffee or Tea: Add ghee to your morning coffee or tea for a creamy, indulgent drink. This is a popular practice in certain wellness circles.

What Other Substitutes Can I Use Instead of Ghee?
If you find yourself in a pinch or want something different, don’t worry! Here are five substitutes for ghee:
- Coconut Oil: This plant-based alternative has similar properties to ghee in terms of heat stability. It does add a subtle coconut flavor, so consider the pairing with your dish.
- Butter: Plain butter is the most straightforward option. While it has a lower smoke point, it can work well in non-high-heat applications.
- Olive Oil: Using high-quality olive oil can give a pleasant flavor and is great for sautéing. Just keep in mind that it has a different profile.
- Avocado Oil: This oil is stable for high-heat cooking and has a neutral flavor. It’s a healthy fat option and works well in many dishes.
- Vegetable Oil: This can be used as an all-purpose alternative, especially in baking. However, it lacks the richness and flavor that ghee provides.

How to Make Ghee
Equipment
- Glass jars, strainer
Ingredients
- 1 pound unsalted European-style butter
- ½ teaspoon fine sea salt
- 1 teaspoon vanilla bean paste
Instructions
Step 1: Prep Your Materials
- Start by assembling all your ingredients. You’ll need a heavy-bottomed saucepan, a heat-proof spatula, a fine-mesh strainer, and a jar for storing the ghee. I usually choose a glass jar because it’s easy to clean and shows off that beautiful golden color.
Step 2: Melt the Butter
- Place your unsalted butter in the saucepan over medium-low heat. As the butter begins to melt, you’ll hear soft crackling sounds. This is where the magic starts! It’s like watching a performance unfold.
Step 3: Let It Simmer
- Once the butter is fully melted, reduce the heat to low. Allow the butter to simmer gently. You’ll notice the milk solids start to separate and sink to the bottom. Keep stirring occasionally, gently scraping the bottom of the pan to ensure even cooking. This is where the aroma starts to fill the air. It’s captivating!
Step 4: Watch for Color Change
- After about 10-15 minutes, the butter will begin to foam. This is normal; it’s just the water evaporating. As it continues to cook, the milk solids will turn golden brown. This phase is crucial— don’t walk away! Keep a close eye on it. You want to catch the moment right before the solids turn too dark, as that can introduce a bitter taste.
Step 5: Strain the Ghee
- Once you see the milk solids at the bottom turning golden brown, remove the pan from the heat. Allow it to cool slightly for a minute, then carefully pour the melted ghee through the fine-mesh strainer into your jar. You can also use cheesecloth for an even finer filter if you prefer. Discard the solids. Congratulations, you’ve made ghee!
Step 6: Cool and Store
- Let your ghee cool to room temperature before sealing the jar. It will solidify into a beautiful golden butterfats. When I first made ghee, I couldn’t believe I had created such a delightful ingredient.
Notes
- Use good quality butter: The flavor of your ghee is only as good as the butter you use.
- Keep the heat low: This prevents burning and ensures that the milk solids cook evenly.
- Be patient: Ghee takes about 20-30 minutes to make; rushing it can lead to a burnt flavor.
- Store properly: Ghee can be stored at room temperature in a cool, dry place for up to three months.
- Experiment with flavors: Once you master basic ghee, feel free to try adding herbs or spices during the cooking process for a unique twist.
Nutrition
Frequently Asked Questions
How long can I store ghee?
Ghee can be stored at room temperature for up to 3 months. If you refrigerate it, it can last up to a year.
Can I make ghee from salted butter?
Yes, but it’s best to use unsalted butter. Salt can cause the milk solids to brown too quickly, affecting flavor.
Is ghee suitable for people with lactose intolerance?
Ghee is generally safe for those with lactose intolerance, as the milk solids, which contain lactose, are removed during the clarification process.
What’s the difference between ghee and clarified butter?
While both are clarified, ghee is cooked longer, allowing for the milk solids to caramelize slightly, giving it a unique flavor.
Can I use ghee in vegan cooking?
Ghee is not vegan because it’s derived from animal products. If you’re vegan, consider plant-based alternatives like coconut oil.
Conclusion
Making ghee is one of those culinary adventures that can transform your kitchen journey. The rich, nutty flavor adds depth to any dish, and the process itself is gratifying. With just a few simple ingredients and a little patience, you’ll find yourself crafting not just a cooking fat, but a masterpiece that enhances your culinary creations. So roll up your sleeves, grab that butter, and let’s make some ghee! You’ll never look at butter the same way again.


